
A 70s Update
My house in Kenilworth has been in the family for decades - My grandmother, a teacher from Kimberly purchased the house in the early 70s where she lived until 2016. Some of my earliest memories are of her and doing puzzles in the kitchen.
The kitchen had begun to show it's age and after years of putting it off, we decided it was time for a complete overhaul.


Cabinets had begun to rot, laminates and veneers started to peel off. The floor had faded and de-laminated in places and the tiles were clearly not from this century.
The design phase began with drawings and renders inspired by Terrence Conran's book: Kitchens - The Hub of the Home.

After some back and forth with a few people with more expertise than myself (my step-mother, Kate) we settled on a minimal, modern design that would better utilise the space while keeping costs low.
Having never designed, built or remodelled a kitchen before - there was a lot to learn during this process.

The final design included an island which could be used as the dining table as well as prep area with storage. The cabinets would be built from scratch with a solid oak countertop and floating shelves. Pendant lights would hang from the high ceilings and the laminate floor would be removed. The original concrete floor would be re-done and painted once everything had been stripped away.
The backsplash would use new tiles, new appliances and fixtures, plumbing and electrics to be redone. I had a lot of work to do.
So with (some of) the right tools for the job - demolition began.

I think this was by far the most difficult part of the project. The tiles in particular took forever to remove, pulling large pieces of plaster and cement off of the bricks underneath. This was all done by hand with a chisel and hammer - I'd highly recommend renting a power hammer for this kind of job.
After removing the old cabinets, laminate flooring, tiles, plumbing and old rusty plug sockets it was time to clean and paint the concrete floor.

The next part to tackle was repairing the walls as there was significant wear to the plaster and concrete which needed to be flat for the new backsplash to be installed.
Having never tiled before - I did my research (on Youtube) and began the prep work.

With a cheap laser level and a few prayers I went right in. I must say, I found this process enjoyable and extremely satisfying. Grouting especially.

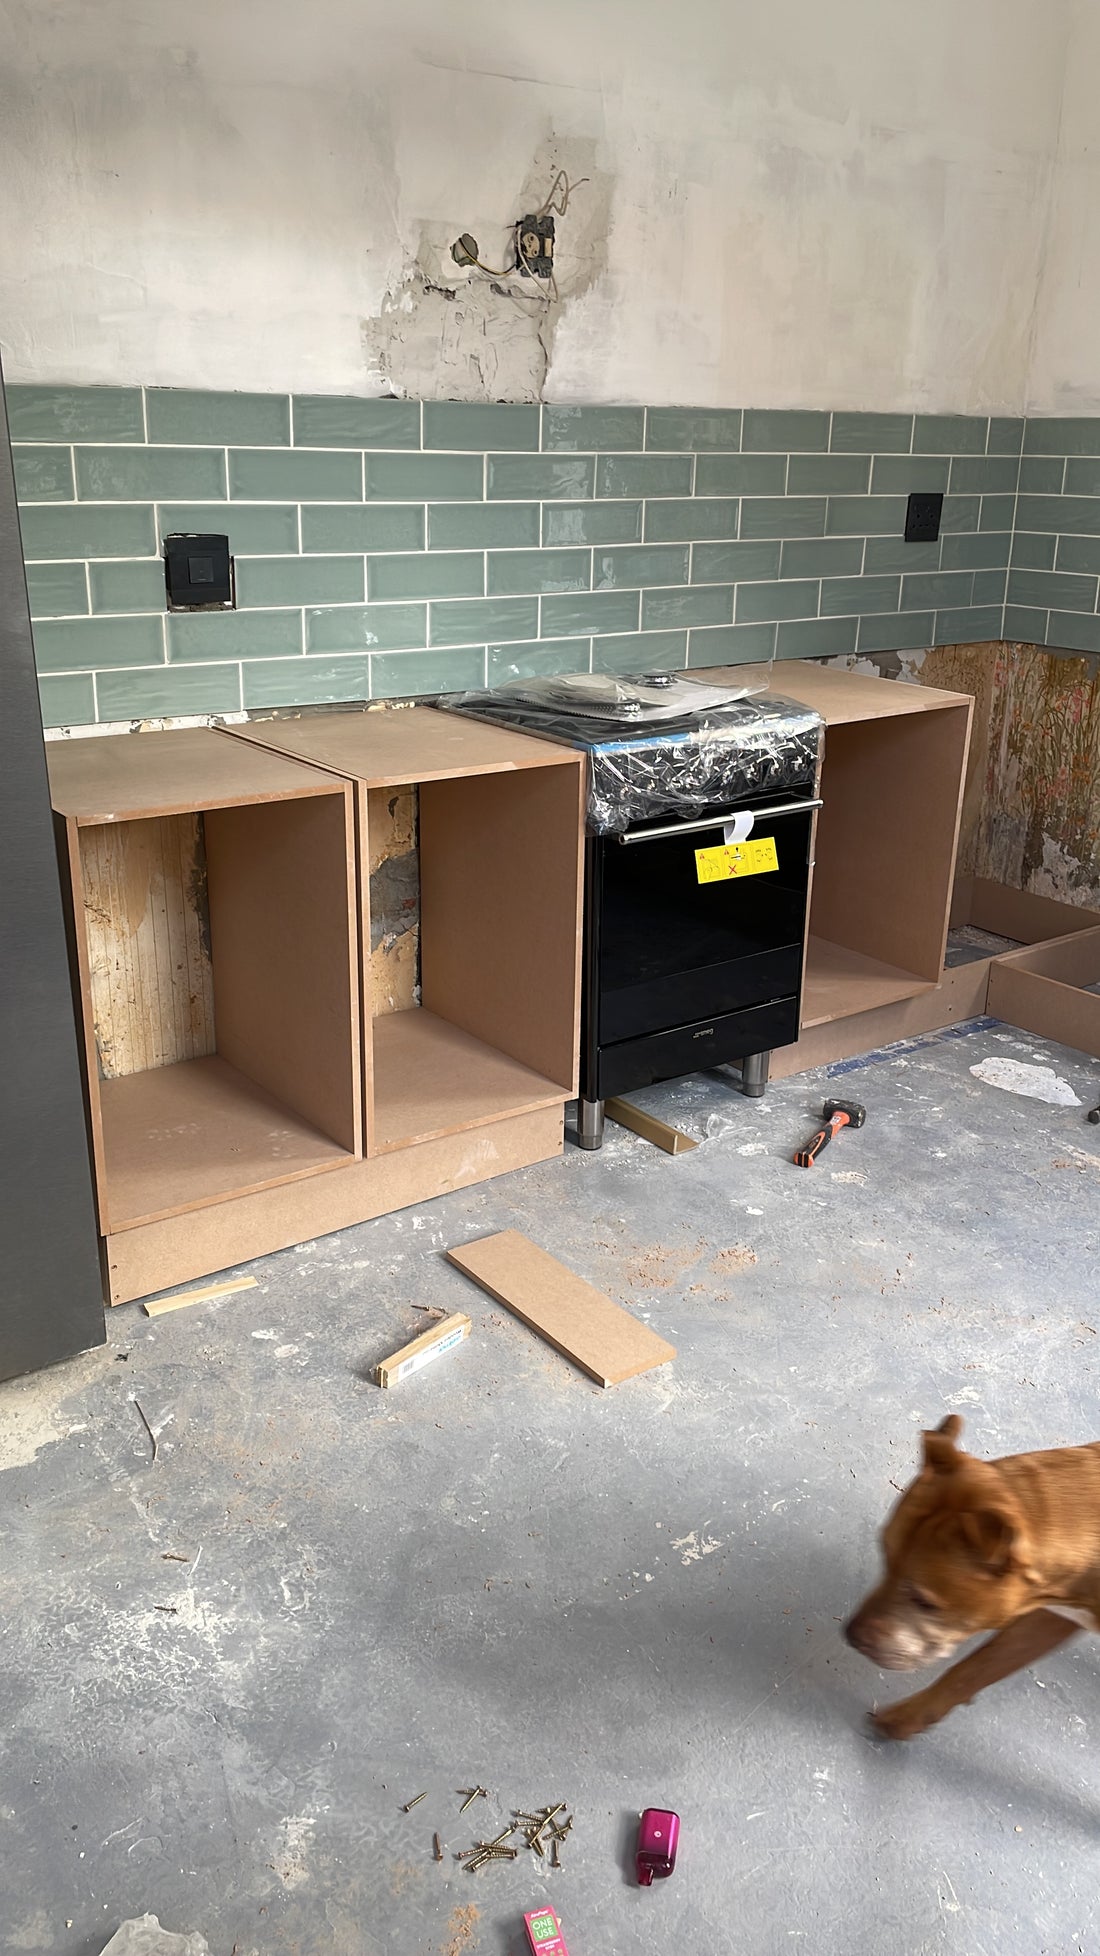
Once the tiles were all installed and left to dry overnight I could begin with the cabinets. I'd contemplated a few different materials for these; plywood, solid wood, melamine and MDF but decided on MDF for it's stability and price.

Having a detailed cut list from the final drawings was a game-changer. I had all parts cut to final size and delivered to the site which made installation and assembly far easier than I originally thought.


Once the cabinets were levelled and secured I began on the next phase - the oak counter tops.

After selecting my material I cut it down to length at the workshop. The glue ups were done in the kitchen so I could fit the tops and sand them in their resting places. I used my cheap biscuit cutter to join all the boards but you get what you pay for and there was a ton of sanding and flattening before I could get to finishing.

Before applying finish, I needed to tackle the sink. Again something I have never done before but I found to be fairly intuitive and the process went smoothly. The plumbing kit that came with the sink worked well and was relatively easy to install.

Next step was to apply finish to the counters. I used Rubio Monocoat for this as I have had good results in the past. In retrospect I should have done a second coat for extra protection as there are some patches showing a bit of wear but overall I was very happy with the look and feel.


After the finish had cured, the cabinet doors and hardware could go in. I decided to use the original brass hardware which required a bit of restoration.
Installing the drawer slides for the island was next, then onto paint. I settled on a dark charcoal as the kitchen gets a lot of natural light.

Getting closer and closer to completion, there were a few items left. New outlets, brackets for the floating shelf, appliances to install and hook up to water/power. The pendant lights had to be installed from inside the ceiling which was no joke having 5m high ceilings.
I ran the gas line for the stove, added a new breaker and light switches. Installed the windowsills using oak I had left over from the cabinets. I built a spice drawer and began the finishing touches.

Overall this project took me about three weeks to complete. If I was to do it again there are of course a few things I would do differently. Having an extra pair of hands would be top of that list. Doing the entire thing on my own was no doubt a challenge but I learned many lessons and tricks throughout this process.
There are a few touch ups and bits and pieces to finish still, such as a final coat of the floor, painting the window frames and hanging art etc. but overall I'm very satisfied with how it turned out. I managed to stay well within the budget and it probably cost me less than half of what it would have cost to have a team of professionals do the work.


After living with the kitchen for a few months, I feel it's totally transformed how my partner and I use the space. It's probably time to do those finishing touches but I feel those finishing touches might stay finishing touches for a bit.